






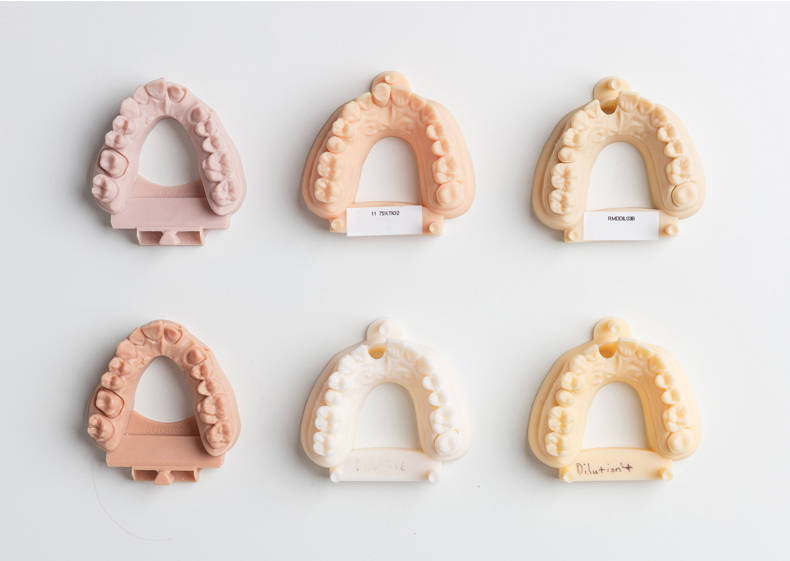
Dentro de la familia de tecnologías de impresión 3D basadas en resina, la DLP (Digital Light Processing) ocupa un lugar único. A diferencia de la SLA, que polimeriza la resina punto por punto con un láser de barrido, y a diferencia de la LCD, que utiliza una máscara de cristal líquido, la DLP emplea un dispositivo de microespejos digitales (DMD) para proyectar el patrón completo de una capa sobre la resina líquida de una sola vez. Esta diferencia fundamental confiere a la tecnología DLP una clara ventaja en cuanto a velocidad para la producción en serie de piezas pequeñas y de alta precisión.
Sin embargo, la tecnología DLP no es una solución universal. Desde la selección de la resina y los límites de las normas de diseño hasta el control del posprocesamiento y las comprobaciones de estabilidad de la producción, cada paso puede afectar a la precisión, la resistencia y el aspecto de la pieza final. Esta guía aborda los principios de la tecnología DLP, los sistemas de materiales, las especificaciones de diseño, los flujos de trabajo de posprocesamiento, las comparaciones con SLA y LCD, y consejos clave para pasar del prototipo a la producción. Ayuda a los ingenieros a tomar decisiones acertadas sobre el proceso.
1. ¿Qué es la impresión 3D DLP?
DLP son las siglas de «Digital Light Processing» (procesamiento digital de luz). Se trata de un proceso de impresión 3D de curado capa por capa basado en resina fotosensible. Pertenece a la misma familia de tecnologías de fotopolimerización que SLA (estereolitografía) y LCD (SLA enmascarada). La diferencia clave entre las tres es el sistema de generación de imágenes. El DLP utiliza un proyector digital basado en un chip DMD. El SLA utiliza un láser UV de barrido. El LCD utiliza una matriz de LED con una máscara de cristal líquido.
Las principales ventajas de la tecnología DLP se resumen en tres puntos: rápida exposición de la superficie, gran nivel de detalle y calidad de superficie uniforme. Dado que cada capa se cura de una sola vez como una imagen completa, en lugar de punto por punto, la tecnología DLP imprime mucho más rápido que la SLA con la misma altura de impresión. Añadir más piezas apenas afecta al tiempo de exposición por capa. Esto hace que la tecnología DLP sea ideal para modelos dentales, patrones de fundición de joyería, prototipos funcionales de precisión y piezas de producción de bajo volumen.
2. Cómo funciona la impresión 3D DLP
2.1 Componentes principales y configuración de la compilación
Una impresora 3D DLP típica consta de cuatro componentes principales. En primer lugar, un depósito de resina que contiene la resina líquida fotosensible. En segundo lugar, una plataforma de impresión que se eleva o desciende para soportar la pieza capa a capa. En tercer lugar, un sistema de proyección utiliza un proyector UV con un chip DMD. En cuarto lugar, un mecanismo de control de capas gestiona el movimiento de la plataforma y el grosor de la capa de resina. La mayoría de las impresoras DLP actuales utilizan una configuración de abajo hacia arriba. El proyector se sitúa debajo del depósito de resina y proyecta luz UV a través del fondo transparente del depósito sobre la resina.
2.2 El proceso de impresión en seis pasos
El proceso de impresión concreto consta de seis pasos básicos:
- En primer lugar, el software de corte divide el modelo digital en 3D en una serie de imágenes por capas. Cada imagen representa una sección transversal.
- En segundo lugar, la plataforma de impresión desciende hasta situarse a una distancia equivalente al grosor de una capa por encima del fondo del depósito. Esta distancia suele ser de entre 25 y 100 micras.
- A continuación, el proyector proyecta el patrón de la capa actual sobre la resina líquida. La luz ultravioleta desencadena una reacción de fotopolimerización que endurece la zona expuesta, formando una sección transversal sólida.
- A continuación, la plataforma de impresión se desplaza hacia arriba una distancia equivalente al espesor de una capa. Esto permite que la resina líquida nueva rellene el hueco de impresión.
- Además, en los sistemas de tipo «bottom-up», la elevación de la plataforma genera un movimiento de desprendimiento. Esto separa la capa curada de la película antiadherente de la cubeta.
- Por último, el ciclo se repite hasta que se completa toda la pieza.
2.3 El tiempo de impresión no lo dice todo
El acabado de la impresión no significa que el ciclo de producción haya finalizado. Las piezas recién impresas suelen presentar resina líquida sin curar en su superficie. Deben someterse a un proceso de limpieza, retirada de soportes y postcurado UV para alcanzar sus propiedades mecánicas definitivas y la calidad superficial deseada. Por lo tanto, a la hora de evaluar la eficiencia de la producción con DLP, hay que incluir el tiempo de posprocesamiento en el ciclo completo. No te fijes únicamente en el tiempo de impresión de la impresora.
2.4 Exposición paralela y eficiencia por lote
Otra característica clave de la tecnología DLP es su capacidad de exposición en paralelo. Todas las piezas dentro del área de proyección se curan al mismo tiempo en una misma capa. Por lo tanto, añadir más piezas dentro de un área de proyección fija apenas afecta al tiempo de exposición por capa. Esto significa que la tecnología DLP puede gestionar la producción en serie de forma eficiente. Es una de las razones fundamentales por las que la tecnología DLP se utiliza ampliamente en laboratorios dentales y en la fundición de joyería. Por supuesto, la precisión final de la impresión también depende de muchos factores, entre los que se incluyen el tamaño de los píxeles de proyección, la calidad del sistema óptico, las propiedades de la resina y la calibración de la máquina.
3. Cómo elegir la resina DLP adecuada
3.1 Partir de la aplicación prevista
Las resinas DLP son polímeros fotosensibles. La selección del material debe partir siempre del uso previsto de la pieza. Los distintos casos de uso plantean requisitos muy diferentes en cuanto a resistencia mecánica, resistencia al calor, seguridad en contacto con la piel y capacidad de moldeo. Elegir una resina inadecuada puede provocar el fallo de la pieza durante su uso o que no se cumplan las necesidades funcionales.
| Necesidad de piezas | Familia de resinas recomendada | Usos habituales |
|---|---|---|
| Comprobación del aspecto y pruebas de ajuste | Resina estándar | Modelos conceptuales, estudios de forma, prototipos de ajuste |
| Manipulación con carga o repetida | Ingeniería / resina resistente | Prototipos funcionales, soportes, carcasas, plantillas |
| Flexión, compresión o sellado | Resina flexible / similar al caucho | Juntas, sellos, piezas de tacto suave, amortiguadores |
| Entornos con altas temperaturas | Resina resistente a altas temperaturas | Utillaje, accesorios, prototipos resistentes al calor, insertos para moldes |
| Seguridad en el contacto con el cuerpo, validada | Resina médica y odontológica | Guías quirúrgicas, modelos dentales, plantillas para alineadores |
| Fundición por colada de precisión en metal | Resina moldeable | Joyería, modelos para fundición de precisión |
3.2 Comprender las compensaciones entre materiales
El rendimiento de los materiales siempre implica concesiones. Por ejemplo, las resinas para altas temperaturas suelen ser más frágiles que las resinas resistentes. Los materiales flexibles sacrifican rigidez a cambio de flexibilidad. Por eso, los ingenieros deben comparar las fichas técnicas reales de los materiales. No se debe dar por sentado que una resina ofrece el mejor rendimiento en todos los aspectos. En el caso de las piezas funcionales, hay que centrarse en las propiedades que importan en el uso real. Entre ellas se incluyen la resistencia a la tracción, la resistencia a los impactos, la resistencia al calor, la elongación antes de la rotura o la estabilidad frente al envejecimiento a largo plazo. No se debe elegir una resina solo porque se comercialice como “de grado de ingeniería”.”
3.3 Consideraciones sobre el poscurado y los costes
Las necesidades y el coste del poscurado también son factores que no se pueden pasar por alto. Muchas resinas de ingeniería y de alta temperatura requieren un ciclo de poscurado UV estrictamente definido para alcanzar las propiedades mecánicas o térmicas especificadas. Si el poscurado no es el adecuado, el rendimiento real de la pieza puede quedar muy por debajo de los valores indicados en la ficha técnica del material. Al mismo tiempo, las resinas especiales de ingeniería, médicas y para altas temperaturas suelen ser mucho más caras que las resinas estándar. Esto puede elevar el coste unitario en la producción en serie. Antes de la producción, comprueba siempre que la resina seleccionada sea compatible con la longitud de onda de la impresora de tu proveedor, el disolvente de limpieza y el proceso de curado.
4. Reglas de diseño DLP: píxeles, grosor de las paredes y soportes
Las reglas de diseño DLP están estrechamente relacionadas con la resolución de la imagen proyectada y la resistencia mecánica de la resina curada. Comprender estas reglas te ayuda a evitar fallos de impresión, pérdida de precisión y defectos superficiales ya en la fase de diseño. Esto mejora las tasas de éxito en la primera pasada.
4.1 Píxeles y tamaño mínimo de las características
Un proyector DLP distribuye una matriz de píxeles de tamaño fijo por toda su superficie de proyección. Cuanto más pequeños sean los píxeles de proyección, más detalles se pueden mostrar. Sin embargo, hay que tener en cuenta que el elemento más pequeño que una máquina puede fabricar de forma fiable suele ser mayor que un solo píxel. Esto se debe a que la difracción óptica, la dispersión de la energía de exposición, el comportamiento de curado de la resina y la calibración de la máquina influyen en la precisión real.
Si un diseño combina detalles finos con una superficie de impresión bastante grande, compara el tamaño real en píxeles con el tamaño de los detalles. No te fíes únicamente de la etiqueta del proceso “DLP”. Los distintos sistemas DLP pueden variar mucho en cuanto al área de impresión, el tamaño de los píxeles de proyección y la resolución óptica. Por lo tanto, debes comprobar la viabilidad del diseño basándote en las especificaciones de rendimiento de la máquina concreta.
4.2 Aspecto de la superficie y efecto escalonado
Las superficies curvas o en ángulo pueden presentar un ligero efecto escalonado o textura durante la impresión por capas. Este efecto puede ser difícil de apreciar en piezas pequeñas y de alta resolución. Sin embargo, se hace más visible en superficies anguladas de gran tamaño o en caras muy visibles. Puedes mejorar el aspecto de varias formas. Ajusta la orientación de la pieza para que las caras críticas queden lo más verticales posible. Reduzca el grosor de las capas. Aplique un ligero posprocesamiento, como el lijado o el pulido.
4.3 Espesor de las paredes y estructuras finas
Las paredes, las nervaduras y los pasadores muy finos pueden deformarse durante la impresión o romperse al retirar los soportes y manipular la pieza. Esto ocurre especialmente con las resinas frágiles. Por lo tanto, las estructuras delicadas pueden necesitar paredes ligeramente más gruesas, o bien se puede elegir una resina más resistente para mejorar el rendimiento. Como norma general, el grosor mínimo de las paredes debe ser de al menos 0,5-1,0 mm. El valor exacto depende de las propiedades de la resina y del tamaño de la pieza.
4.4 Estructuras de soporte y orientación de la construcción
La mayoría de las impresiones DLP de tipo «bottom-up» necesitan estructuras de soporte para sostener salientes y elementos aislados. Esto evita que la pieza se deforme o se desprenda durante la impresión. Sin embargo, los puntos de contacto de los soportes dejan pequeñas marcas que pueden afectar al aspecto de la superficie. Por lo tanto, debes ajustar la orientación de la pieza para mantener las caras estéticas críticas alejadas de los soportes. Deja también espacio para la limpieza y el acabado tras la retirada de los soportes. En el caso de piezas con requisitos estéticos muy exigentes, puedes colocar los puntos de soporte en caras no críticas o en zonas que se vayan a eliminar posteriormente.
5. Flujo de trabajo de posprocesamiento de DLP
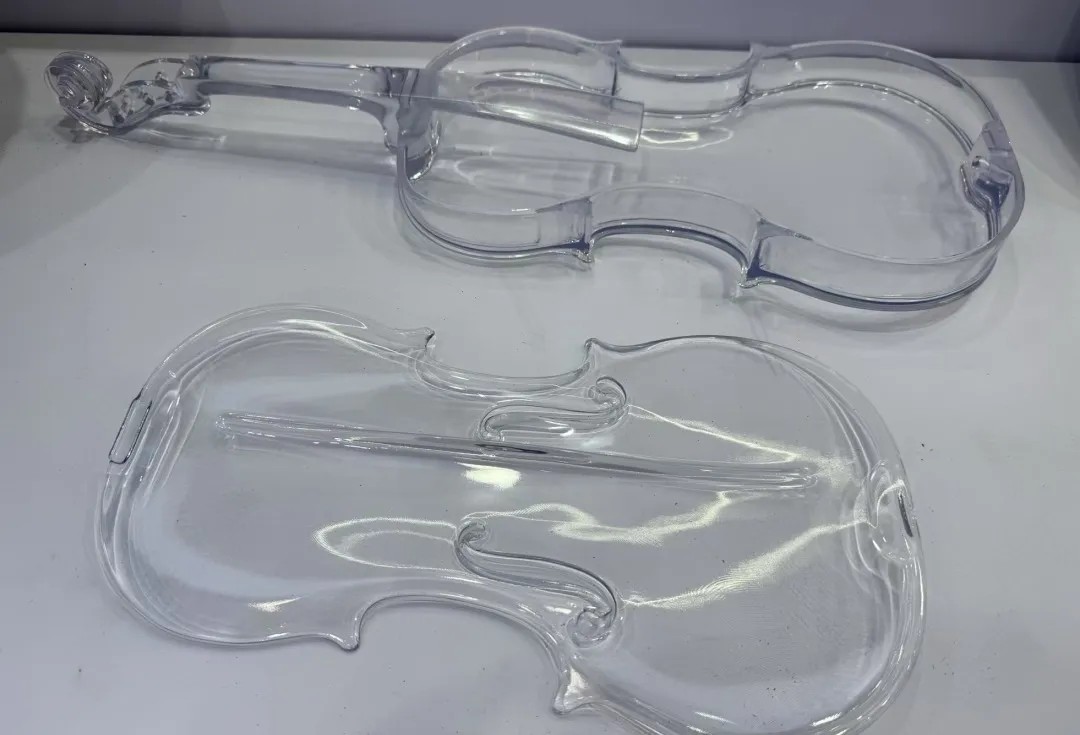
Un flujo de trabajo completo de posprocesamiento DLP incluye la limpieza, el poscurado UV cuando sea necesario, la retirada de los soportes y los pasos de acabado opcionales. Estos pasos influyen no solo en el aspecto final de la pieza, sino también en que esta alcance la resistencia mecánica y la estabilidad dimensional especificadas para el material.
5.1 Limpieza
Las piezas recién impresas presentan restos de resina líquida sin curar en su superficie. Si no se limpian rápidamente, estos restos de resina se endurecerán durante su manipulación posterior. Esto provoca que las superficies queden pegajosas o que se pierdan detalles. Normalmente se utiliza alcohol isopropílico (IPA) o un disolvente de limpieza especial. Combínalo con un limpiador ultrasónico o un equipo de limpieza específico para eliminar los restos de resina. Durante la limpieza, sigue al pie de la letra los pasos y los tiempos recomendados por el fabricante de la resina. Así se evita una limpieza excesiva que provoque grietas en la superficie o el hinchamiento de los detalles. Evita también el contacto innecesario con el disolvente para garantizar la seguridad del operario.
5.2 Postcurado por UV
En el caso de los materiales que requieren un poscurado, el poscurado controlado con rayos UV ayuda a que la pieza alcance la resistencia, la rigidez, el comportamiento térmico y la estabilidad dimensional especificados. El poscurado suele realizarse en una cámara de curado UV específica. La cámara proporciona luz UV uniforme y calefacción opcional. Siga al pie de la letra el tiempo de curado, la temperatura y la longitud de onda recomendados por el fabricante de la resina. No haga estimaciones. Un curado insuficiente da lugar a una baja resistencia de la pieza y a una escasa estabilidad dimensional a largo plazo. Un curado excesivo puede hacer que la pieza se vuelva quebradiza o provocar su amarilleamiento.
5.3 Retirada de los soportes y acabado
Tras la impresión y la limpieza, debes retirar las estructuras de soporte a mano o con herramientas especiales. Los puntos de contacto de los soportes pueden dejar pequeñas protuberancias o abolladuras. Puedes limarlas con papel de lija, limas o herramientas de pulido. Las piezas que requieran un acabado estético de alta calidad también pueden someterse a pulido, pintura, recubrimiento metálico u otros tratamientos superficiales. Ten en cuenta que estos pasos manuales de posprocesamiento son muy importantes a la hora de calcular el coste y el plazo de entrega de la producción en serie. Aunque la impresora en sí sea rápida, la limpieza, la retirada de los soportes, el curado, la inspección y el acabado pueden requerir mucha mano de obra. Pueden convertirse en cuellos de botella en todo el flujo de producción.
6. DLP, SLA y LCD: comparación y elección de tecnologías
Las tecnologías DLP, SLA y LCD pertenecen todas a la impresión 3D basada en resina. Todas ellas endurecen una resina líquida fotosensible mediante luz ultravioleta. Sin embargo, utilizan sistemas de generación de imágenes diferentes. Esto da lugar a diferencias en cuanto a velocidad, precisión, elección de materiales y estructura de costes. Comprender estas diferencias te ayuda a elegir el proceso más adecuado para tu caso de uso específico.
| Punto de comparación | DLP | SLA | LCD (SLA enmascarado) |
|---|---|---|---|
| Fuente de luz | Proyector digital basado en la tecnología DMD | Láser UV de barrido | Matriz de LED con máscara LCD |
| Método de curado | Exposición de capa completa / área completa | Escaneo punto por punto | Exposición completa con máscara |
| Velocidad de impresión | Normalmente es rápido por capa | Normalmente es más lento por capa | Normalmente es rápido por capa |
| Precisión en los detalles | Depende del tamaño de los píxeles, la óptica y la resina | Depende del punto del láser, la óptica y la resina | Depende del tamaño de los píxeles, la óptica y la resina |
| Elección de materiales | Se necesitan resinas específicas para la longitud de onda DLP | El sistema de materiales más consolidado, la selección más amplia | Se necesitan resinas compatibles con la longitud de onda de las pantallas LCD |
| Coste del equipo | Moderado | Superior (calidad industrial) | Gama baja (ordenadores de sobremesa convencionales) |
| Usos habituales | Odontología, joyería, piezas de precisión, lotes | Prototipos, utillaje, piezas pequeñas o grandes | Odontología, prototipos, piezas de precisión, de sobremesa |
En la práctica, la tecnología DLP resulta especialmente atractiva para la fabricación de piezas pequeñas de alta precisión y la producción en serie. La tecnología SLA sigue siendo la opción preferida para muchos prototipos de precisión y para grandes aplicaciones industriales. Cuenta con el sistema de materiales más consolidado. La tecnología LCD abarca una amplia gama, desde sistemas de sobremesa asequibles hasta plataformas profesionales. En los últimos años ha logrado grandes avances en cuanto a resolución y fiabilidad.
No hay ningún proceso que sea mejor en absoluto. El tamaño de la pieza, los requisitos de detalle, la disponibilidad de materiales, el volumen de producción y el rendimiento real de cada máquina concreta deben ser los factores que determinen la elección del proceso. Por lo tanto, una comparación eficaz debe realizarse entre máquinas, no entre procesos. Dos sistemas DLP distintos pueden presentar grandes diferencias en cuanto al área de impresión, el tamaño de los píxeles de proyección, la validación de los materiales y la velocidad de producción. No se puede dar por sentado que tengan el mismo rendimiento solo porque ambos se denominen “DLP”.”
7. Ámbitos de aplicación habituales
La tecnología DLP resulta especialmente útil en aplicaciones que requieren un alto nivel de detalle, superficies lisas y eficiencia en la producción por lotes. A continuación se ofrece una visión general de los principales ámbitos de aplicación.
7.1 Asistencia dental y médica
Los laboratorios dentales constituyen uno de los mayores mercados para la tecnología DLP. Esta tecnología se utiliza ampliamente para fabricar guías quirúrgicas, modelos dentales de mandíbula, plantillas para alineadores y restauraciones provisionales. Permite fabricar de forma eficiente piezas pequeñas y de gran precisión utilizando materiales especiales aptos para el contacto con el cuerpo. Los usos médicos siguen una lógica similar. La tecnología DLP resulta adecuada para modelos anatómicos, herramientas de planificación quirúrgica y carcasas de dispositivos médicos a medida. Sin embargo, los usos implantables suelen requerir una certificación de materiales y una validación de procesos más estrictas.
7.2 Joyería y fundición de precisión
Puedes utilizar resinas DLP moldeables para imprimir modelos de fundición de gran precisión destinados a la fundición a la cera perdida. Este proceso es ideal para la fabricación de pequeñas piezas de joyería. Algunos ejemplos son las monturas para piedras preciosas, las formas decorativas detalladas y los anillos personalizados. La alta resolución y las superficies lisas de la tecnología DLP permiten que los modelos de fundición reproduzcan fielmente los detalles más sutiles. La alta eficiencia por lote lo convierte, además, en una sólida alternativa a los patrones de cera tallados a mano de forma tradicional.
7.3 Creación de prototipos funcionales y desarrollo de productos
En el caso de piezas pequeñas, la tecnología DLP permite fabricar rápidamente prototipos funcionales con gran nivel de detalle. Las resinas de ingeniería pueden ofrecer una resistencia mecánica similar a la del producto final. Se pueden imprimir varias variantes de diseño una al lado de otra en la misma placa de impresión. Esto agiliza las iteraciones y las pruebas comparativas A/B. Por ello, la tecnología DLP es una herramienta eficaz en el desarrollo de productos para la electrónica de consumo, los interiores de automóviles, los dispositivos médicos y los equipos industriales.
7.4 Producción de bajo volumen
Cuando las prestaciones del material se ajustan al caso de uso y resulta difícil justificar el elevado coste inicial de los moldes de inyección, la tecnología DLP puede servir de apoyo para la producción de volúmenes bajos a medios de piezas de precisión. Entre los ejemplos más habituales se incluyen conectores, piezas micromecánicas, utillajes a medida y dispositivos médicos personalizados. La función de exposición paralela de la tecnología DLP hace que el coste unitario por tiempo de la producción por lotes sea competitivo. Sin embargo, hay que tener en cuenta los costes de mano de obra del posprocesamiento y los controles de consistencia de los lotes.
8. Del prototipo a la producción: aspectos clave a tener en cuenta
Pasar de la fabricación de prototipos a la producción en serie implica un cambio fundamental en las prioridades. La pregunta pasa de ser “¿puede la impresora fabricarlo?” a “¿puede el proceso producirlo de forma constante, fiable y asequible?”. A continuación se indican varios aspectos a los que debes dar prioridad en la fase de producción.
8.1 Control de la consistencia de los lotes
Un prototipo satisfactorio no garantiza que todos los lotes futuros vayan a ser iguales. El estado del lote de resina, la calibración de la impresora, el desgaste del sistema óptico, la temperatura ambiente, la orientación de la pieza y los ajustes de poscurado pueden afectar a la precisión dimensional y a la resistencia mecánica de la pieza final. Por lo tanto, debes evaluar las piezas de producción dentro de unas tolerancias razonables. También debe recurrir a la inspección del primer artículo (FAI) para confirmar la estabilidad del proceso. En el caso de las dimensiones críticas, establezca un seguimiento periódico del proceso y controles por muestreo.
8.2 Evaluación de la estructura de costes completa
Cuanto mayor es el volumen de producción, más importantes se vuelven los costes de la resina, la mano de obra y el posprocesado. Aunque la impresión en sí misma sea muy eficiente, la limpieza, la retirada de los soportes, el curado UV, la inspección de dimensiones y el acabado pueden requerir mucha mano de obra. La capacidad de posprocesado también puede convertirse en un cuello de botella en todo el flujo de producción. Es posible que la impresora complete rápidamente toda una bandeja de impresión. Sin embargo, cada pieza debe someterse, una por una, a los procesos de limpieza, curado, retirada de soportes e inspección. Antes de establecer los planes de producción, asegúrate de que estas etapas posteriores puedan seguir el ritmo de la velocidad de producción de la impresora. De lo contrario, te enfrentarás a una acumulación de trabajo en curso y a retrasos en los plazos de entrega.
8.3 Planes de validación y documentación de calidad
Establecer un plan de validación sistemático es fundamental para la producción. Los controles repetidos de la producción aportan numerosas ventajas. Entre ellas se incluyen la inspección del primer artículo, el muestreo de dimensiones críticas, la supervisión del proceso de curado y el seguimiento de los lotes de resina. Garantizan que el proceso se mantenga estable a lo largo de tiradas prolongadas. Para aplicaciones de montaje o usos médicos o dentales controlados, confirme con antelación qué registros de inspección, documentos de certificación de materiales o certificaciones de sistemas de calidad (como la ISO 13485 o la ISO 9001) puede proporcionar el proveedor.
8.4 Cuándo plantearse procesos alternativos
El DLP suele ser la mejor opción para la producción en serie, sin moldes, de piezas pequeñas de precisión. Sin embargo, a medida que el diseño del producto se estabiliza y el volumen sigue aumentando, el moldeo por inyección puede resultar más asequible. El coste del molde se puede repartir entre un mayor número de piezas. Además, la producción automatizada basada en ciclos reduce considerablemente el coste unitario y la dependencia de la mano de obra. Por lo tanto, evalúa el punto de cambio de volumen durante la planificación del proyecto. Aclara si la DLP funciona como proceso de producción definitivo o solo como solución temporal antes de la producción en serie.
9. Preguntas frecuentes
¿Cuál es más preciso: DLP o SLA?
No se puede afirmar sin más que una sea más precisa que la otra. El tamaño de los píxeles de proyección, el sistema óptico y las propiedades de la resina influyen en la precisión de la tecnología DLP. El tamaño del punto láser, la precisión del espejo de desviación del láser y las propiedades de la resina influyen en la precisión de la tecnología SLA. La tecnología SLA de grado industrial suele ofrecer ventajas para piezas grandes y formas complejas. La tecnología DLP destaca en piezas pequeñas y de alta resolución. La precisión real debe evaluarse en función de los parámetros específicos de la máquina y los datos medidos.
¿Se pueden utilizar directamente las piezas impresas mediante DLP?
Normalmente, no directamente. Las piezas recién impresas presentan resina sin curar en su superficie. Aún no han alcanzado su resistencia mecánica definitiva. Deben someterse a un proceso de limpieza, retirada de los soportes y postcurado con rayos UV para alcanzar las prestaciones especificadas del material. En el caso de piezas con requisitos estéticos exigentes, es posible que también sea necesario aplicar un acabado adicional, como lijado, pulido o pintado.
¿Es la tecnología DLP adecuada para la producción a gran escala?
La tecnología DLP es adecuada para la producción de piezas de precisión en volúmenes bajos o medios. Es especialmente habitual en los sectores dental y de la joyería. Su capacidad de exposición en paralelo hace que la producción por lotes sea eficiente. Sin embargo, para volúmenes muy elevados (como decenas de miles de unidades o más) con diseños estables, el moldeo por inyección suele ofrecer un mejor coste unitario y una mayor uniformidad. El punto exacto de cambio depende del tamaño de la pieza, su complejidad, los requisitos del material y los costes de posprocesamiento manual.
¿Son todas las resinas DLP intercambiables?
No. Las diferentes marcas y modelos de impresoras DLP pueden utilizar distintas longitudes de onda UV. Las más habituales son 385 nm o 405 nm. Las resinas deben ser compatibles con la longitud de onda de la impresora para que se curen correctamente. Además, algunas impresoras utilizan sistemas de materiales cerrados que solo admiten resinas oficiales o certificadas. Al seleccionar los materiales, comprueba siempre que la resina elegida sea totalmente compatible con tu modelo específico de impresora, el disolvente de limpieza y el proceso de poscurado.
Conclusión
La impresión 3D DLP, con su exclusivo método de curado por exposición de área, se ha ganado un lugar privilegiado en la creación rápida de prototipos y la producción en serie de piezas pequeñas y de alta precisión. Su principal ventaja radica en la combinación de alta precisión, superficies lisas y eficiencia en la producción en serie. Esto la hace especialmente adecuada para aplicaciones en el sector dental, la joyería, la creación de prototipos funcionales y la fabricación de piezas de precisión en series reducidas.
Sin embargo, para utilizar con éxito la tecnología DLP no basta con elegir una impresora. Es necesario tener en cuenta de forma sistemática la compatibilidad de los materiales de resina, los límites de las normas de diseño, el control del flujo de trabajo de posprocesamiento, las comprobaciones de consistencia de los lotes y la revisión completa de la estructura de costes. Solo integrando estos elementos en el plan general del proceso se pueden aprovechar al máximo las ventajas técnicas de la tecnología DLP. Esto también ayuda a evitar fluctuaciones inesperadas en la calidad o sobrecostes durante la transición del prototipo a la producción.
PartsMastery ofrece servicios integrales, desde prototipos de impresión 3D con tecnología DLP hasta la producción en series reducidas. Ayudamos a los clientes a tomar decisiones profesionales sobre la selección de materiales, la optimización de procesos, el control del posprocesamiento y la evaluación de costes. Esto contribuye a que los proyectos avancen sin contratiempos desde la validación del concepto hasta la producción estable.